My Own Version of English Cucumber Sandwiches

June 30, 2010

This is a snack that I made during one of my vegetarian days. I know its just a simple sandwich, but I did try having it with, and without vinegar and the one with the cucumber soaked in vinegar just taste so much different. Here is the recipe.

Ingredients:

1. Half an English cucumber. This MUST be english cucumber, we don’t want to be using chicken rice local cucumber.
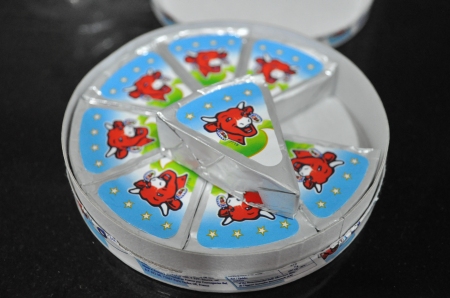
2. Cream cheese. I use the lightsmiling  moo cow brand one.

3. Bread. Any sandwich bread will do.
4. Soft butter.
5. White vinegar (Preferably white wine vinegar, but I used normal white vinegar since I do not have white wine)

Instructions:

1. After washing the english cucumber, slice it into roud shapes very very thinly.
2. In a plate, splatter some salt across the sliced cucumber. After about one minute, all the juices should have started to come out of the cucumber. Grab a bunch of cucumber in your hand and squeeze it dry. The cucumber should now look slightly transluscent. The reason we do this is so that the vinegar can absorb easier into the cucumber since there are less liquid now.
3. On the same, dry plate, sprinkle (not sure if this is the right word!) some vinegar over the cucumber to make sure that each and everyone of them are covered with vinegar. Soak for one hour.
4. Squeeze the cucumber dry again after one hour. And then pat the cucumber dry with kitchen paper.
5. Cut the skin off the bread and apply butter to both the inside area of the bread. Then continue to apply cream cheese as a second layer.
6. Arrange the cucumber neatly on the bread on one side. Two layers will do. Too many will make the sandwich very hard to handle when eating. Cover with the other half of the sandwich.
7. Enjoy this sandwich with english tea!

Tangy and Yummy Thai Mango Salad

June 25, 2010

I am on vegetarian for one week for religious reasons so I have been thinking of what vegetarian dishes I can cook up. I did try garlic bread two days ago, but although it tasted good, the picture didn’t look nice, hence no posting for that one. Since I just came back from Thailand, I thought of making thai mango salad. One of my favourite thai salads, but without the dried shrimps since this is a vegetarian dish. To me, the main ingredient that makes this dish nice is the palm sugar. And I actually bought this all the way from Thailand because I don’t see any supermarkets here selling it. I guess they will have it in Golden Mile, but since I saw so many selections in Bangkok I decided to get one pack back. Using normal sugar or even brown sugar just doesn’t bring the taste of the sugar out. And if you use sugar, even after diluting it with the lime juice, you will still taste the granules, which is no good! Another thing is to use the mortar when making this salad because it really blends all the ingredients’ taste together very well. But of course you can still mix it in a bowl if you don’t have a mortar and pestel. Here is the recipe for my tangy thai salad.

Ingredients: (Serves 1)
1 ping pong ball sized palm sugar
1 small unripe/green mango, shredded
2 shallots, cut into chunks
2 limes (or more if you want it to be sour)
A handful of roasted peanuts (skin off)

Instructions:
1. In a mortar, first put in the shallot chunks and pound it until it is crushed.
2. Add in the peanuts and pound it until it is crushed.
3. Add in the palm sugar. Since the palm sugar is solid, you will need to pound it in a circular motion so that it will blend in with the peanuts and shallots.
4. Add in the lime juice and mix everything together. Then taste the mixture and see if it is too sour or sweet. Adjust the taste accordingly by adding palm sugar or more lime juice.
5. Add in the shredded mango and blend it in with the other ingredients.


Awesome Pasta with Spicy Sausages and Bacon

June 15, 2010

I was craving for pasta again. Another heartwarming food I must say. For pasta, my favourite ones are the tomato based ones. And one thing good about making it at home is, you can really ‘tune’ the pasta according to your taste buds. You know how when you eat out, sometimes the pasta sauce is too sour, or too bland. I really can’t stand it when the pasta is too sour. So that’s why making it at home eliminates all these uncertainties! I got this recipe from Yee Ling. Only made minor changes but I think this sauce rocks!

Ingredients (Makes 4 servings):

3 Spicy sausages (those italian ones that they sell in the supermarket) – Skin removed
1 Brown Onion (Medium Size)
3 Rashes of Bacon (Lean)
1 Can of Button Mushrooms
1 Can of Diced Tomatoes (400g)
1 Can of Tomato Paste (The smallest can you can get)
1 Handful of spaghetti
Sugar and salt to taste

Instructions:

1. Cut the onion into small bits, and the bacon into chunks. Then heat the pan up with some oil, and sautee the onions with the bacon until both are brown.
2. Cut the sausages into big chunks and sautee together until all ingredients are browned and there is a very nice fragrance.
3. Add in mushrooms, sautee for about 2 minutes.
4. Add in 2/3 of the tomato paste and mix with the ingredients.
5. Add in diced tomatoes.
6. Add the remainder of the tomato paste with one tea cup of water. This depends on how much sauce you want. You can use between one to one and a half cups of water. Too much will dilute the sauce.
7. This is the point where you add sugar. And to me, this is probably the most important step. Because adding sugar determines the sourness level of your sauce. I add in quite a bit because like I mentioned, I don’t like sour sauces! Add also a pinch of salt.
8. Simmer for another 6 minutes and the sauce is done! Mix it with the pasta.

For pasta, before cooking the sauce, boil some water in a pot and add in a lot of salt. Then cook the pasta according to the instructions on the packet.


Home Is Where the Fried Rice Is!

June 13, 2010

After cooking the mushrooms with chicken that day, I still had some button mushrooms left, some spring onions from something else that I cooked, and some leftover rice. So what better than to cook fried rice! Fried rice and fried beehoon are two of my favourite meal for one. Even though I am normally a small eater, for some reason if you put a plate of very nice fried beehoon or fried rice in front of me, I gobble up more than the portions that I normally eat. For me, fried rice is a dish where you can throw in whatever you want but when I make fried rice, the must have’s are eggs and shallots. Somehow, I find that the rice is not so aromatic if you just put in garlic instead of shallots. The rest are freestyle! Here goes the recipe.

Ingredients (Serves 1):

Half a chinese sausage, cut into tiny bits
2 eggs
1 bowl of rice
1 handful of spring onions
3 shallots
6 button mushrooms (large), cut into thin slices

Seasonings:

Mix the following ingredients in a bowl:

2 teaspoons of oyster sauce
1 tablespoon of soy sauce
Half teaspoon of sugar

Instructions:

1. Heat about 1 tablespoon of oil in the wok. Pour the beaten eggs in and fry till eggs are like cooked scrambled eggs.
2. Dish the eggs out and heat another tablespoon of oil in the wok.
3. Put in shallots and chinese sausage and fry till shallots are slightly brown.
4. Add in button mushrooms and continue frying till mushrooms are slightly browned.
5. Add in rice and seasonings. At this stage, you will need to keep frying the rice so that it does not stick to the wok. Fry it for a good 5 minutes so that the rice is totally dry and fragrant.
6. Add in spring onions. I like the spring onions slightly cooked so I fry it for 30 seconds or so.
7. Add in the eggs.
8. Dish it out and garnish with more spring onions!


Chicken and Mushroom Stew

June 8, 2010

I still have a portion of the chicken that I bought last week (the last pack!). So I thought of cooking the chicken and mushroom stew. Its a very typical chinese dish but a very heartwarming dish I would say. Its so nice to pour the sauce of this dish and eat it with rice! Yummy! And come to think of it, the ingredients is quite similar to the claypot chicken rice, except for the chinese sausages!

Chicken with Mushroom Stew

Ingredients (Serves 2):

250g Chicken parts
6 button mushrooms (large), cut into half
4 shitake mushrooms, cut into half
6 shallots whole

Seasoning:

2 tablespoons oyster sauce
1 tablespoon dark soya sauce
3 tablespoons soy sauce
1 tablespoon sugar
1 cup water
2 tablespoons shaoxing wine
4 sprinkles of rice wine
2 teaspoons of corn flour mixed with water

Instructions:

1. Add hot water to chicken parts. This is to make sure that the dirt from the chicken parts are washed away. After 1 minute soaked in hot water, wash it with cold water.
2. In a pot, heat up 1 tablespoon of oil. Add in shitake mushrooms, shallots and fry for about one minute till fragrant.
3. Add in chicken parts. Fry till chicken is brown.
4. Add in button mushrooms.
5. Add in the oyster sauce, sugar, soy sauce, shaoxing wine and rice wine. This depends on individual taste. If you think that you want it to be more salty or sweet, by all means add more sugar or soy sauce.
6. Add in the one cup of water.
7. Boil for 20 minutes, or until reduced. Then add in corn flour mixture to thicken the sauce.


Claypot (Or more of a Rice Cooker) Chicken Rice

June 5, 2010

I bought one kampung chicken from Tekka Market last week, and I still have 2 quarters of the chicken left. So I was thinking what I could do with it. I always prefer eating kampung chicken compared to the normal ones, although it is slightly more expensive, but the texture of the meat is tender and not too soft, which is what I like.

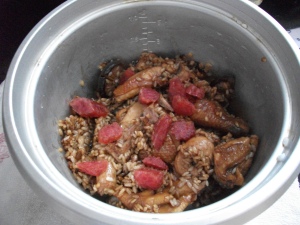
So I was looking in my fridge to see what I got, which is how I got the idea of cooking claypot chicken rice, but in a rice cooker. It is easier with a rice cooker because you don’t actually have to look at the rice every single minute. Just leave that job to the rice cooker. And it cooks faster too! The only thing about the pictures in this post is, I forgot to take the picture after it is cooked! (Bummer!) But it looks quite similar to the picture below)

Rice (Right after frying)

Rice (After adding water)

Recipe for Claypot Chicken Rice (Rice Cooker Style)

Ingredients (Serves 2 small servings):

Half an onion (I use red onions)
3 cloves of garlic
1 cup of rice
5 Dried shitake mushrooms
250g chicken (any chicken parts will do) – Marinated with soy sauce, oyster sauce, rice wine and chinese shaoxing wine, dark soya sauce
1 chinese sausage, cut into slices
1 teaspoon sugar
1 tablespoon oyster sauce
1 teaspoon dark soya sauce
1 teaspoon rice wine
1 tablespoon shaoxing wine

Instructions:

1. Depending on the rice that you are using, wash the rice and soak for half an hour. The rice that I am using is the Japanese rice, and it definitely needs to be soaked first. But I find that soaking the rice really makes it more soft and fluffy when it is cooked. Leave aside to soak while you prepare other ingredients.

2. Marinate chicken with the sauces for 10 minutes. I marinate it with the mushrooms (pre soaked in water) but this is personal preference. You can put the mushrooms in later after cooking also.

3. Cut onion and garlic finely.

4. Heat oil in a wok or pan, the put in onion and garlic. Fry till soft.

5. Add in the chicken pieces and mushrooms together with marinate. After the chicken has been slightly browned, add in the additional sauces (oyster sauce, dark soy, sugar) and drizzle the rice wine and shaoxing wine from the side of the wok.

6. After chicken is about 3/4 cooked, pour away the water that is soaking the rice, and add the rice to the wok.

7. Fry the rice with the chicken for about 5 minutes till the rice is slightly brown in colour. You can add in more dark soy at this stage if you want to.

8. Add the fried raw rice into the rice cooker with all the ingredients.

9. Add adequate water. This varies depending on the rice you use. In this case, for my japanese rice, it is one cup of rice for one cup of water. But make sure the water covers the rice.

10. Cook as how you would cook normal rice. 

11. Nice rice cooker chicken rice coming up!


Marutama Ramen At United Square

June 4, 2010
Marutama Ramen has always been one of my favourite places to have ramen. But the problem is, the nearest one from my place is Central, so I am always too lazy to make a trip all the way there to eat!

One fine day, I was just taking a stroll at United Square, and I just went to that corner shop where Pizza Hut used to be, because I wanted to see what is the new shop that has replaced Pizza Hut. And to my surprise, it was Marutama Ramen. I was literally jumping for joy because now I don’t have to go so far to eat my favourite ramen! I don’t know how to describe how good Marutama Ramen is, but the soup base is just fantastic, topped with fresh seaweed (not like those dried ones that we normally have), and a piece of Char Siew. That’s all I need. I mean the soup itself is so tasty that I don’t really need to add any more things. The noodles are also very springy and not too soft, just the way I like it! And another interesting thing about this restaurant is their menu only has a few items, which makes it easy to choose, because you don’t have much choice! I normally eat the spicy noodles, and this spicy noodles has the exact same colour as the normal one (I was expecting a red colour soup base), but you can definitely taste the spiciness. I am not sure what they do to that soup to make it spicy.

My rating is 4.5 out of 5 stars for this restaurant. My next target will be the ramen at Gallery Hotel that so many people are raving about. But for now, this is the address for one of the best ramen in Singapore (from my point of view):

Marutama Ramen
101 Thomson Road
#B1-07/08 United Square
Tel: +6563526369
Opening Hours: 11.30a.m. to 10.00p.m.

Spicy Marutama Ramen (Before)

Marutama Ramen

Marutama Ramen (After)